Photo Restoration Project
Not too long ago my Aunt came to me with a photo restoration challenge. She pulled out a folder of about 30 photos from her parents wedding day. These were some of the only photos left from the day and unfortunately they had been badly damaged. The photos were heavily glued into a photo album and the glue soaked through the photo paper, damaging the paper and discoloring the ink. She asked if there was anything I could do.
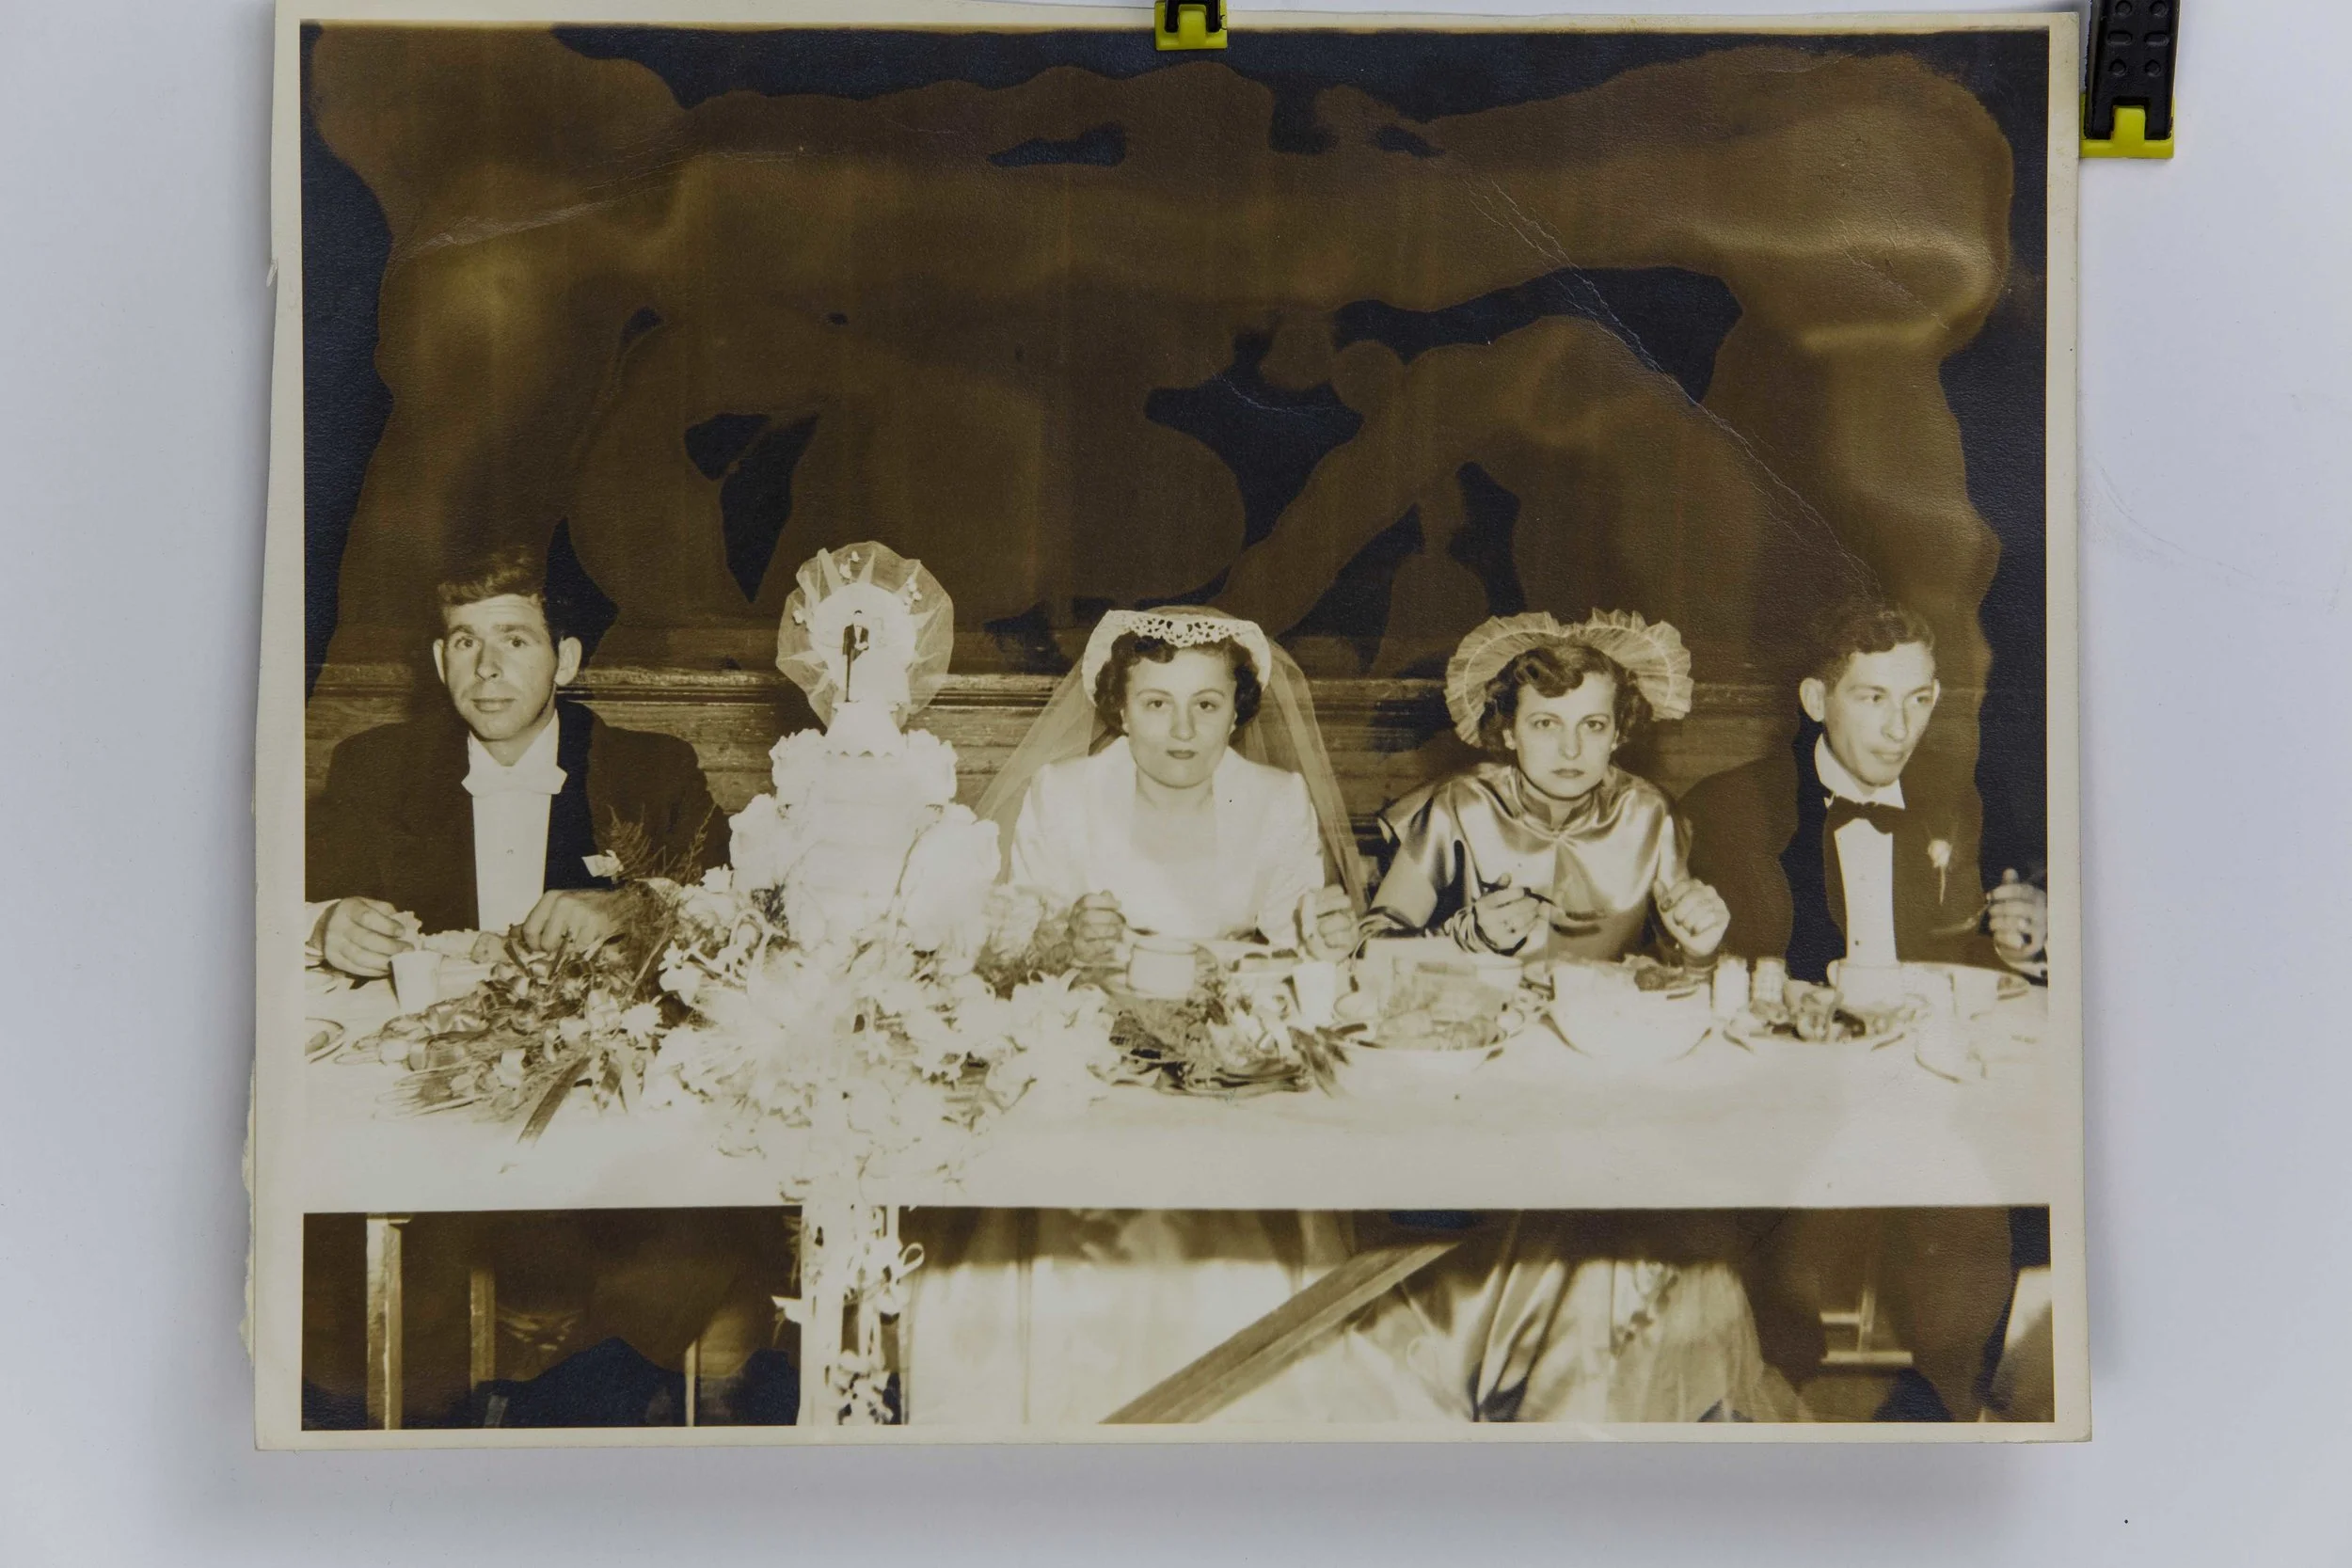
Original - before editing
Ouch, the damage looks pretty bad in the above photo. If I'm to be completely honestly, at first I didn't have a clue if I was going to be able to restore the damage. At first the project was pretty intimidating but there were some positives about the photos. Most importantly, none of the originals were torn or folded which certainly made my job easier. I felt confident that I could improve the quality, however I was never faced with damage quite like this.
The first step for this project was to digitize the prints. I needed digital files so I could import the raw files into Lightroom and Photoshop so I can work out the discoloration issue. Below is a video of the studio set up.
Once, I got the files into Lightroom I was able to work out a good work flow. I figured out by converting the files to black and white the discoloration issue improved a great deal. Then I was able mix the color channels to blend the yellow/orange color into the undamaged areas. Next I imported the files into Photoshop to clean up where the ink was washed out. The photoshop process was defiantly the lengthy part of the entire project but it was time well spent. Below is the final image.

Final image
I am so excited how this project turned out. The final prints are great improvements from where I started and the best part, the photos are now digital so the rest of the family have access to them. It was a great joy to see how happy my Aunt was to see the finished photos. Now onto the next project!